Digital technology has drastically changed the world around us, and implant dentistry is no exception. Gone are the days of freehand implant placement and compromised soft-tissue outcomes with less-than-ideal restorative results.
Today's patients expect dental implants to look and function like their natural teeth; thus, the bar for implant aesthetics has never been higher. With that goal in mind, it is imperative that we consider integrated solutions that allow us to deliver the best results possible for our patients. The Sirona Orthophos XG 3D with Galileos cone-beam CT (CBCT) software (Dentsply Sirona) enables the user to plan treatment and then predictably execute the surgical and restorative processes.
This implant case report details a two-visit implant placement in a 38-year-old patient.
Two implants?
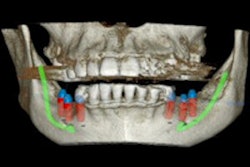
This patient presented with severe coronal caries for teeth #8 and #9. Anticipating both teeth to be nonrestorable, a treatment plan for two implants was developed (figure 1). Before treatment, the patient's intraoral condition was imaged using the Cerec Omnicam (Dentsply Sirona). A CBCT image was obtained using the Orthophos XG 3D.
 Figure 1: The treatment plan for the patient's teeth Nos. 8 and 9. All images courtesy of Dr. Ross Enfinger.
We merged the patient's two datasets (teeth and soft tissue and also osseous information) using implant treatment planning software. From this we developed a prosthetically driven virtual surgical plan. At that point, we also designed a surgical guide that was 3D-printed in advance of the implant placement surgery (figure 2).
 Figure 2: The surgical guide used for this patient's treatment.
We determined that tooth #8 was restorable on caries excavation, so a full-contour composite buildup was done (the guide sleeve for #8 was removed from the surgical implant guide). Next, tooth #9 was extracted atraumatically.
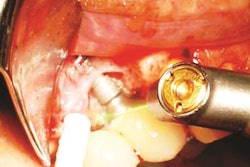
Then we used a prefabricated surgical guide to direct the osteotomy drill sequence, immediately placing the NobelActive implant fixture (Nobel Biocare) in a fully guided fashion (figure 3).
 Figure 3: The implant being placed.
With the implant torqued into place at greater than 50 Ncm, a digital ScanPost (Denstply Sirona) was then placed and imaged to facilitate the design of a Telio CAD (Ivoclar Vivadent) screw-retained immediate provisional using the Cerec Chairside CAD/CAM software (figure 4).
 Figure 4: Imaging and design of implant provisional.
The immediate provisional restoration was manufactured using the Cerec MCXL in-office milling unit (Dentsply Sirona) and delivered in the same visit, with care taken to intentionally undercontour the emergence profile and leave the restoration out of occlusion (figure 5).
 Figure 5: Care was taken to leave the restoration out of occlusion.
When the procedure was completed, verification radiographs were compared with the preoperative plan.
6-month integration
After a six-month period to allow the patient's soft tissue to heal and the implant to integrate, the patient returned to the office for re-evaluation. At that point, the original provisional design was modified to full-emergence contours, brought into occlusion, and modified from a screw-retained restoration into a split design with a separate IPS e.max CAD (Ivoclar Vivadent) custom abutment and an abutment-supported implant crown.
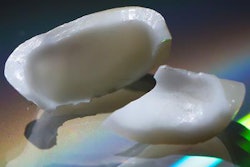
The restorative components were then milled on the MCXL, crystallized in a Programat P500 furnace (Ivoclar Vivadent), and characterized using stain and glaze. The abutment was then bonded onto a TiBase (Dentsply Sirona) (figure 6).
 Figure 6: The bonded abutment.
Finally, tooth #8 was prepared for a crown restoration. The tooth was imaged, and the crown was designed and milled so that both restorations could be delivered simultaneously to complete the entire surgical and restorative process in only two clinical visits (figure 7).
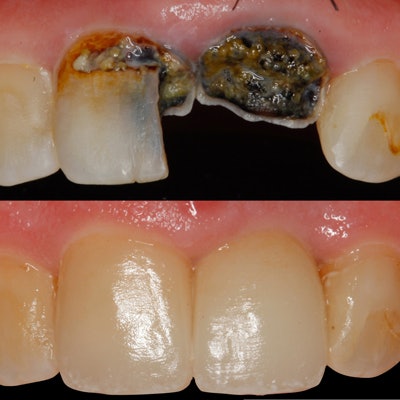
 Figure 7: Before and after treatment images.
By starting the treatment-planning process with the end result in mind, the entire digital implant workflow was predictably navigated, and an excellent clinical result was achieved. Furthermore, both the patient's and the clinician's chair time can be reduced through utilization of integrated digital processes of CBCT and CAD/CAM technology.