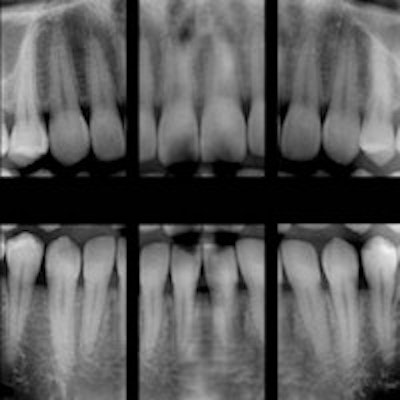
The modern dental practice requires modern quality assurance (QA) checks. Now an article in Dental Update has outlined tests for digital radiography that are designed to serve the general dental practice setting (March 2014, Vol. 41:2 pp. 126-134).
"Quality assurance is essential, and there is a legal obligation for it to be carried out," explained lead author Chris Greenall, BDS, specialty registrar in dental and maxillofacial radiology for the Cardiff and Vale University Health Board in Cardiff, U.K., and colleagues. "With the advent of digital systems, new tests need to be incorporated into the QA program to include the digital x-ray equipment and the viewing monitors."
In preparing for their paper, the authors sought QA tests for digital intraoral and panoramic systems that can be performed in the dental practice by the available, properly trained staff. The need for it was clear, since film is steadily being phased out, and they found a dearth of information available in the literature about performing these QA tests. An opportunity to present such tests appeared when the Institute of Physics and Engineering in Medicine (IPEM) issued a document about them; Dr. Greenall and his colleagues utilized many of its recommendations and classification systems.
The IPEM has divided QA tests into two categories based on the expertise level required to perform them. QA tests at Level A, for example, can be quickly and easily undertaken by trained dentists with equipment that is readily available, while Level B tests are specialized.
The institute also classifies the tests further by priority. Priority 1 tests are "the recommended minimum standard" good practice tests, while Priority 2 are best practice tests with frequency influenced by costs, workload, and other factors. Testing frequency is linked to the device's workload, so there is a shorter frequency between testing for higher radiographic workload devices.
The first tests cover image receptors. With photostimulable phosphor plates (PSPs), each should have a unique, identifiable mark and be stored in a dust-free place. Visual checks for dust and scratches should be performed monthly and cleaned per the manufacturer's instructions. If the PSP's surface has visible scratches, the plate should be exposed to see if they are significant.
"The PSP should be placed on a flat surface, at a set distance from the end of the spacer cone, and given a short exposure," the authors noted. Then it should be read and graded on a subjective scale. They provided two categories as examples: Category 1 has no scratches or none that interfere with the diagnostic use of the image, while Category 2 has scratches or marks severe enough to render the image nondiagnostic. The latter should be disposed of.
Meanwhile, solid-state detectors (SSDs) should have their casings inspected for cracks or damage on a monthly basis. Damaged SSDs, of course, should be removed from use. The quality of the images using either PSPs or SSDs should be evaluated for possible visual deterioration on a monthly basis as well.
Checks for image uniformity for intraoral radiographs can be done less frequently, every one to three months. After placing the image receptor at a fixed distance from the spacer cone and performing a short exposure, the image should be inspected. Look for nonuniform areas such as lines or rectangular areas, which should be investigated, and other artifacts, such as PSP case scratches.
For panoramic radiography, test the reproducibility and beam alignment and synchronization of the exposure with a tube. "These two tests are carried out together and are necessary to ensure that there are no regions of nonuniformity or artifacts on the image," the authors noted, "and also to check that the panoramic exposure is entirely within the area of the image receptor and that there is no disruption in the motion of mechanical components."
The test requires a reference image that should be taken after installation or as close to it as possible. For the test image, the tester uses a 1-mm-thick copper strip that is roughly 2-cm wide as a filter to attenuate the x-ray beam, Dr. Greenall and colleagues explained. Tape the copper strip over the beam collimator without attaching it to moving parts. Then take a standard adult panoramic exposure and examine the image.
Next, compare the "density" of the image to the reference image to ensure that there are no areas of nonuniformity while taking into consideration the higher density band at the midline of the image. The image examination should also include confirmation of a contained radiation field. And, any signs of additional vertical banding should be looked for, since they indicate possible faults in the device's rotational motion. Lastly, archive images where significant artifacts are noted since they can be seen by engineers for correction purposes.
In regard to image display, Dr. Greenall and colleagues noted that the IPEM urged four level A, priority 1 tests: image display monitor condition, grayscale, distance and angle calibrations, and image monitor resolution.
For the first test, two test patterns can be used to check the monitor condition: Society of Motion Pictures and Television Engineers (SMPTE) and the Technical Group 18 QC. For both patterns, "the 5% detail superimposed on the 0% square and the 95% detail superimposed on the 100% square should be visible," the authors explained. Adjust the settings as necessary.
The grayscale test requires a photometer, which can be prohibitively expensive, and the authors suggested trying to include the test in the service level agreement if possible.
Distance and angle calibration may be carried out with simpler means. A metal ruler can be used to measure both horizontal and vertical planes by first placing it on the detector and using an exposure that displays the measurement markings. Distance-measuring dental digital software can then be used to measure a known distance, "as large as possible on the ruler," the authors explained. Then repeat the process with the ruler placed at 90° from the original position.
"The IPEM suggest changes more than ±5 mm need investigation," the authors wrote.
Angle measurement also should be taken if the ruler is cut at a right angle. Simply take a radiograph of the end of the ruler and measure the angle using the software's angle measurement tool. A change ±3° should be investigated, according to the IPEM.
For digital radiography to remain a highly effective tool, clinicians should diligently monitor the performance of their equipment. Tests such as these can help maintain a high standard of care.


