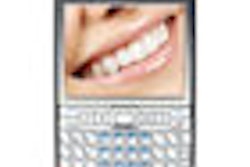
A picture can be worth a thousand bucks--if you know how to take it properly. A clear, sharp, well lit intraoral photo can convince that stubborn insurance company or nervous patient that yes, some perio treatment or restorative work really is needed.
Taking a winning shot doesn't necessarily require mastering f/stops and Photoshop, says Richard Young, D.D.S. Dr. Young, who gave a talk on dental photography at the recent ADA show in San Francisco, knows whereof he speaks. An assistant professor of restorative dentistry at Loma Linda University and a San Bernardino, Calif. dentist with 22 years under his belt, Dr. Young has been giving hands-on dental photography workshops for the last five years.
For Dr. Young, it's all about keeping things simple. "You're a dentist; you're not going to the Brooks Institute. You need to learn how to take effective dental photos, then get back to work."
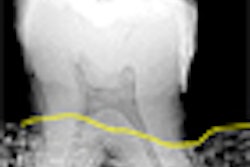
 |
| Using the G9 with twin flashes can result in startlingly clear pictures. |
Why take patient dental photos in the first place?
- Thanks to email, Web, and digital cameras, it's easy to share photos with colleagues and specialists you need to confer with.
- You can use dental photos to show a patient what's really going on in his mouth--how bad a problem is, how good a restoration looks, and so on. "I even create a little PowerPoint presentation to show the patient the steps it takes to get to that aesthetically pleasing end result," says Dr. Young. "It's a big help in prepping them for what they'll face in the chair."
- Cosmetic dentistry is hot--and you need to not only document your aesthetic work for medical reasons, but also for promotional purposes as well. (Poke around the web and you'll find a lot of dental sites that have "smile" pages showing off their work.)
- You can write off all the equipment you buy. But when you're in the throes of gadget lust and about to drop $4,000 on that 12-megapixel high-end digital SLR, think twice. You may find that a modest point-and-shoot digital camera is more than enough.
Getting started
The three most important elements to dental photography are lighting, lighting, and lighting. What flash you use and how you use it are key. Beyond that, composition (framing the shot), and clarity (resolution and sharpness) are fourth and fifth.
The good news? Most modern digital cameras are smarter than you when it comes to taking a good picture, says Dr. Young. That, combined with the right accessories, such as dual flashes and contrasters (thin black strips you slip behind teeth to make them stand out in a photo) can usually ensure a sharp shot.
Dr. Young's M.O? "I examine the patient's teeth, do a survey, note everything I see,then photograph everything--about 15 to 20 shots. (Make sure they sign a release.)" Dr. Young shoots the anterior, anterior retracted, full arches, and all the quadrants. "Then I bring the patient into my consult room with the large LCD screen, show them what I've seen, and what I plan to do," says Dr. Young.
Your first shot, says Dr. Young, should be of the patient's name on their chart. For the next shot, insert twin retractors and shoot the patient's full smile. Check the result--is it in focus? Properly framed? If you're shooting in line with the eyes--instead of the mouth--the smile might appear tilted. Is the shot too dark? Change the angle of the flash. At this point, you may want to take a shot with a ClearMatch dental shade guide held up against the patient's teeth. (Tip: hold the guide at a 45 degree angle.)
A common mistake when taking anterior shots, says Dr. Young, is coming straight in with the camera. For better results, take the shot from a little above. Follow it with shots from below and from each side. Then take shots of the upper arch and upper occlusal using an intraoral mirror, then finally the quadrants. (One tip: when framing the shot, look at the mirror, not the teeth.)
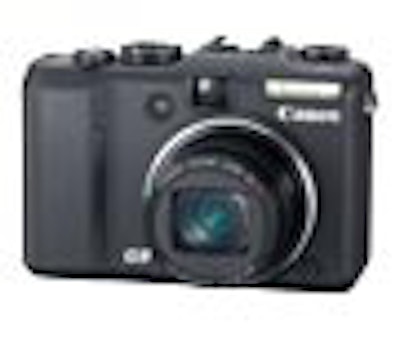
Taking these shots with a full blown SLR and dual flashes can be complicated. Using a smaller, point-and-shoot digital camera, such as the Canon G9, is easier and faster, and the results can be surprisingly good.
The Hardware
There's an endless selection of cameras and accessories. Bottom line, says Dr. Young, is lens quality. The better the lens, the better the shot.
"Spend as much as you can on a lens," says Dr. Young. "And once you've figured out the settings that work for you, make them the defaults and leave them alone!"
 |
| Looking for a camera smarter than you? Canon's point-and-shoot G9 can take sharp dental images with ease. |
Dr. Young typically photographs a patient in one setting. "I generally shoot at f/22 to f/28, with flash sync, with shutter speed set at 160 to 200ths of a second."
As high-end digital cameras go, the Nikon D70 (about $1,800) is a dream. "It's got a ring flash [that surrounds the lens] that's very simple to use." Dr. Young fave is the Canon 40D with twin flashes. He also likes Canon's Rebel XT, 30D, 40D, and 5D.
The Nikon's ring flash is handy, but Dr. Young isn't wild about the results. "The ultimate setup is dual flashes and a bracket that holds the camera steady. The downside: it takes a lot of time to set up."
That's why Dr. Young often turns to a high-end point-and-shoot, like the Canon G9. "It's easy to use, has a simple diffuser on the lens, works well in low light conditions, and incorporates sophisticated flash technology," says Dr. Young. The diffuser (from Photomed) is key, says Dr. Young, because it lets you simulate twin flashes using the camera's single ring flash.
So sophisticated, in fact, that you can turn off your dental lamp when taking a shot, and just rely on the camera's flash.
Other tools you need: retractors; contrasters; intraoral mirrors (coated and polished); a laptop for storing images ("the bigger, the badder, the faster!"); ACDSee FotoSlate image editing software; ACDSee Pro 2 for file management (which lets you crop and rotate images, search for them, and more); a color printer (such as the Epson Stylus Pro 4800); or a photo output service (such as www.nasheditions.com).