BOSTON - Karen was trying on a bridal gown when disaster struck. With all that loose material flowing to the ground, she tripped and broke off half a maxillary central incisor. By the time she showed up at the Restorative Dental Group of Cambridge, MA, she was desperate. "I want it perfect for the wedding photos."
"No problem," responded Alan Sulikowski, D.M.D. "I can make it just like it was before."
"I don't want it like it was before," Karen said. "It was sticking out." That posed the kind of real-world aesthetics problem that Dr. Sulikowski, a Harvard University clinical instructor in prosthodontics, came to discuss at Yankee Dental Congress 33. In a three-hour presentation, he and his colleague, Elliot Kronstein, D.D.S., shared their tips for creating beautiful smiles in complicated situations.
Tip No. 1, the two presenters emphasized over and over, is teamwork. The Restorative Dental Group includes prosthodontists, an orthodontist, an endodontist, and general dentists all under the same roof. And Karen's case was a perfect example of this expertise brought to bear. There wasn't enough space to put Karen's tooth back in the correctly aligned position. And from working with the orthodontist in the practice, Dr. Sulikowski knew that there wasn't enough time before the wedding to make space by moving teeth. Just trimming down the lateral incisor wouldn't provide quite enough room either. And the other incisor already had perfect proportions.
The solution? "We had to apply the rule of frame of reference," Dr. Sulikowski said. By reducing all the incisors, including the height of the mandibular incisors, he created a set of smaller teeth so that the broken one -- with its crown -- fit attractively. The midline of the smile wasn't exactly in the midline of Karen's face, but research has shown that few people notice an off-center midline as long as it's not a crooked midline.
Teamwork and frame of reference were just the beginning of the pearls the two esthetics experts had to share.
Perfect impressions
Making exact impressions is essential to both aesthetics and functionality, said Dr. Kronstein, a prosthodontist. "It's all about the integrity of the luting gap. We're talking about beyond what you can see with the eye. We're talking about trying to finish the luting gap so it's in the range of 20 microns. How many times have we heard people say, 'Don't worry. If it doesn't fit, the resin will take up the space.' Uh, uh. I try to make sure when I take an impression of this tooth, it's 100% or it doesn't leave my office."
Papilla formation
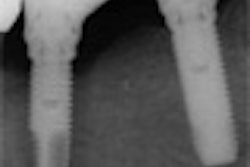
The key to creating a pleasing papilla is that the contact point between two adjacent teeth has to be less than 5 mm from the osseous crest, according to Dr. Kronstein. The percentage of teeth with papillas drops dramatically as the contact area gets farther from the crest. "So as I prepare a tooth, I think about why I'm moving my margins where I am," he said. (When placing an implant, the distance measured should be between the contact point and the osseous crest of the adjacent tooth -- not the contact point and the implant's bone level, Dr. Kronstein said.)
Type 1 patients have long contact areas extending almost the whole length of the two teeth. "If I had a magic wand that I could wave over each patient, I would create type 1 long contact areas. With type 1, you are always guaranteed to have papilla formation," Dr. Kronstein said. Type 2 patients, in which the contact area is in the incisal third, have poor chances of papilla formation. Type 3 patients, in which the contact area is in the middle third are a little better off. "Here you have a shot, but the minute you have some inflammation, you lose the papilla," he said.
Cementation protocols
"How many times have you made a beautiful crown, and the patient says, 'My tooth looks great, it works great, but every time I touch it, it hurts.'?" Dr. Kronstein asked.
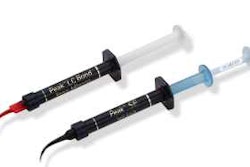
Dr. Kronstein used to experience this problem regularly -- until he began using sixth-generation adhesives, which combine self-etching primer with adhesive. "Less than 1% of my teeth now have postoperative sensitivity," he said. "The reason for that is I do not put etch directly on teeth." He now only applies etch to the luting margin. (Seventh-generation adhesives are not ready for prime time, in his opinion.)
When bonding to zirconium, you should use an agent with MDP molecule (10-methacryloyloxydecyldihydrogenphosphate), which you can find in Panavia F and Clearfil's ceramic primer, Dr. Kronstein said. MDP is also in Ivolclar, but in this product you'll need to add silane.
Dr. Kronstein also plugged Premier implant cement, a resin cement that never fully cures. "The restorations stay in place, but when you want to remove them, you can get them right off because the resin never sets. This cement has been a godsend for us in our office."
Crown materials
But Dr. Kronstein uses mostly zirconium for custom abutments in aesthetic areas. In general, he prefers all-ceramic for crowns. "I've been using all-ceramic materials throughout the mouth for the last 15 years," he said. The only exception is second molars, where he uses Empress. On first molars he uses E.Max. "So, do you need to compromise and go to zirconium which tends to impair the health of the tooth to have more strength than you need?" he asked. Not in his experience.
Likewise, the research shows there is no evidence to show that ceramometal is any better than all ceramic, he said.
Color management
Many dentists consider only the color of a restoration, not the translucency. "Any color we are trying to do will be a combination of the substrate and what's on top," Dr. Sulikowski said. Porcelain veneers are particularly sensitive to the substrate. So when preparing a veneer, consider how much light you want to show through it, a factor governed by the thickness of the veneer.
Restorative Dental Group of Cambridge uses a TD 931 transmission densitometer (Macbeth) to measure the density of veneers. The more Dr. Sulikowski wants to change the color of a tooth, the thicker the veneer he uses. With a reduction of 0.3 mm, he can take advantage of a good existing color. With a reduction of 0.67 mm, he can change the color up to two shades. And with a reduction of 0.8 mm, he can change the color more than two shades.
Copyright © 2008 DrBicuspid.com