One of the procedures that dentists dread the most is matching the single central with an indirect restoration such as a veneer or crown. There are several challenges in doing this. Not only do you have to nail the shape and form, but also the shade and characterization of the adjacent central. It only becomes more challenging if the dentist chooses to fabricate the restoration chairside with CAD/CAM.
Case report
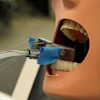
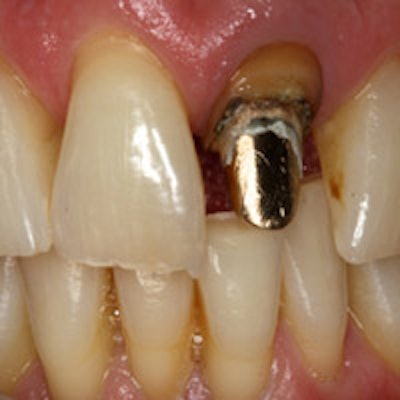
A 44-year-old man presented with the chief complaint of a broken crown on #9 (figure 1). The tooth had a history of root canal therapy and a gold post. Radiographic evaluation was within normal limits. While there was recurrent decay on the tooth, the post looked and felt stable. It was determined that #9 was in need of a new crown. The patient wanted to get a new crown the same day and did not want to come back for a second visit.
 Fig. 1: A broken crown on #9. All images courtesy of Dr. Dhaval Patel.
In terms of preparation, the recurrent decay was removed and the margins were refined. In my experience, blocking dark stumps with all porcelain crowns is difficult. Thus, the gold post was sand-blasted with a microetcher and, along with regular etch and bond, an opaque composite (Gradia Direct Shade A2, GC America) was chosen to mask the dark gold post. With the permission of the patient, the incisal edge of #8 was modified (figure 2).
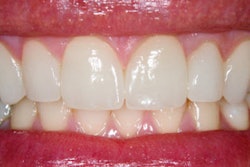
 Fig. 2: Modified incisal edge of #8.
Scan and design
The preparation, along with the adjacent and opposing lower anterior teeth, were scanned using the 4.2 software on the Cerec Omnicam (Sirona) (figure 3). Biogeneric reference design was used to design #9.
 Fig. 3: Image of the adjacent teeth.
With this design method, #8 was chosen as the tooth with the shape that would be copied. This involves outlining #8 and the software then proposing a similar shape for #9 (Figures 4 and 5). The software does an excellent job of proposing a crown, copying the shape of #8.
 Figs. 4 and 5: The software proposes a shape for #9 based on #8.
Material selection
IPS e.max LT Shade A2 was chosen for the teeth. IPS e.max is one of the strongest monolithic porcelain blocks available. Low translucency was chosen to mask the dark preparation because of the gold post.
It took approximately seven minutes for the restoration to be milled with the inLab MC XL milling machine (Sirona). The sprue was removed and the restoration was fitted. Once I was happy with the fit, shape, and form of the crown, it was finished and polished. At this point, the restoration is in the blue stage and requires a crystallization process to stain and glaze (figure 6).
 Fig. 6: The restoration requires a crystallization process to stain and glaze.
Staining and glazing
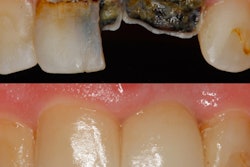
In this case, it was noted during the planning stage that there was a definite change in chroma from the gingival to the incisal edge. The value shade of #8 was A2, so that shade was chosen. However, the gingival third was more like A3 with decalcified spots on the middle third and incisal edge. Therefore, the gingival third was stained with a darker A3 stain, and white decalcified spots were applied to match #8 (figure 7).
 Fig. 7: The tooth's gingival third was stained with a darker A3 stain.
Before bonding, the intaglio of the crown was etched with 4.5% hydrofluoric acid etch for 20 seconds. The enamel at the margin was selectively etched for 15 seconds, washed, and dried. NX3 Nexus and OptiBond XTR (Kerr Dental) bonding system were used to cement the restoration. When the cement reached gel stage, the restoration was tack-cured for two seconds, and excess cement was removed with an explorer. All the surfaces were then cured for 20 seconds each. The proximal surfaces were flossed, and any remaining cement was removed. Occlusion was checked and the margins were polished.
Discussion
In my opinion, it is easy to match a single central in terms of shape, form, and shade when the correct design tools are chosen and enough attention is given in choosing the material and characterizing the tooth with stains that mimic the adjacent tooth.
Dhaval Patel, DDS, has been in private practice in Roseville, CA, for 10 years. He runs a group on Facebook called Keep Cerecing to create an environment for continuous learning for clinicians and assistants using CAD/CAM in their offices. He has also lectured on CAD/CAM at major dental conventions, including CDA Presents and Cerec 30.
The comments and observations expressed herein do not necessarily reflect the opinions of DrBicuspid.com, nor should they be construed as an endorsement or admonishment of any particular idea, vendor, or organization.