A full-mouth restoration can prove a tough sell. It costs the patient up to $50,000 and 30 hours in the chair. But once you've made the deal, you can change someone's life, according to Mike Malone, D.D.S., an assistant professor of prosthodontics at the Louisiana State University (LSU) School of Dentistry.
Speaking at the recent Yankee Dental Congress in Boston, Dr. Malone and his colleague Michael Bellerino, C.D.T., gave dentists concrete advice on how to get the best -- and most predictable -- results with these complicated makeovers. Dr. Malone said he began specializing in such restorations after watching patients gasp with delight after first seeing their dramatic transformations.
Step 1: Making the sale
To convince patients of the benefits, Dr. Malone shows potential clients pictures of his work, explaining how the procedure could affect them. "Try to make it into an emotional need," he said.
Bellerino, also an LSU professor, said after showing patients the "after" photos, he does a slow transition to the original teeth. "At that moment, I sell the case," he said.
If people don't have the money for the entire restoration, Dr. Malone said he discusses payment plans and the possibility of spreading the work out over five or 10 years. Some people may first restore their front teeth, delaying other work that isn't as visible.
Step 2: Measurement
For every case, Bellerino said, there are three keys to success: elaborate design preparation, properly bonding restorations, and managing the occlusion. "We create systems to eliminate problems along the road," he noted.
The team has three goals for any restoration: improving tooth aesthetics, function, and strength. But they always talk with patients at length about what they hope to accomplish -- and sometimes they are surprised. One man came to Dr. Malone's office toting a 4-foot poster of Elvis Presley. (His girlfriend eventually talked him into a more natural look.)
To start the restoration process, Dr. Malone takes extensive measurements. "Smile design is about eliminating distractions to the eyes," he said. "You're trying to create perfect symmetry and perfect proportion."
He gets an accurate bite record and uses a face bow to see how the teeth and jaw relate to each other. When using the face bow, it's important that the horizontal bar is perpendicular to the patient's midline, he said. Dentists should not just look at the positions of a patient's ears for measurements, he warned, noting that some patients have one ear almost a half-inch lower than the other.
Dr. Malone takes at least six sets of impressions on every patient. Sound like a lot? "Think about the hours spent on the case," he said. "It's all about predictability."
To make the final sets of impressions, Dr. Malone uses hydrocolloid material, which he praised as "extremely accurate."
Step 3: Design
When designing the restorations, Bellerino studies the gingival and also the occlusal levels, and determines whether any crown lengthening is needed, he said. He also ensures that the patient's new midline will not go opposite to the flow of the face -- a direction that would interfere with the face's symmetry.
While making the wax-up, Bellerino tries not to do any reductive work to the model. If changes need to be made, he prefers to add wax. The goal is to always preserve as much of the patient's teeth as possible, he said.
Bellerino works to makes sure the teeth won't move back too much and that the bicuspids aren't too steep or flat. If he has one measurement, he can mathematically build the case, he said. The tooth adjacent to the central incisor, for instance, would be two-thirds the size of the central.
But he doesn't trust the wax models too much. Nothing substitutes for what the prototypes actually look like in the patient's mouth, he noted.
Step 4: Preparations
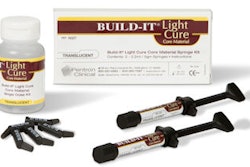
When it's time to prepare the teeth, Dr. Malone removes all the old amalgams, then uses hybrid composites to do any necessary buildups.
Retain as much of the original tooth as you can, he emphasized. That will keep the restoration as strong as possible. Leaving just a tooth peg will weaken the entire structure, he said.
After figuring out where the tooth margins should be, "I connect the dots with electrosurgery," he said. "It cuts like a knife without blood."
Step 5: Provisionals
— Mike Malone, D.D.S.
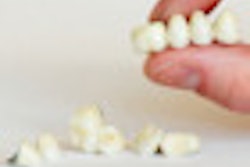
The pair uses Copyplast (Ortoteam) to make the matrix for holding the temporaries, and make the prototypes out of Radica (Dentsply Ceramco).
Dr. Malone never puts a crown next to where a veneer will be because "it doesn't look right," he said. Instead of a crown, he builds up the tooth with bonded hybrid. For teeth that will be covered with veneers, he makes all tooth surfaces concave to better support the porcelain.
Dr. Malone goes beyond having patients wear provisionals and produces a trial unit of one permanent tooth restoration. The extra step of making a trial unit eliminates the majority of all remakes, Bellerino said. "This is a confidence-building process," he said. "You want the patient to be satisfied with the provisionals."
The patient wears this prototype until the next appointment. If there is any hesitation at all, he makes the patient a second trial unit, he said.
Step 6: Final teeth
Once Dr. Malone and the patient are satisfied with the trial unit, he starts making the final restorations, using lithium disilicate because of its strength.
When it comes time for bonding, Dr. Malone doesn't use the latest generation of bonding material. "If you want to get the best bond of material to the tooth structure, use the fourth or fifth generation," he said. Later generations only slightly reduce bonding time, he noted.
He cleans teeth with an air abrasion unit rather than pumice, and uses Clearfil Liner Bond 2V (Kuraray Dental) for the bonding agent, which he calls the "best on the market." He spends a full day putting in the permanent restorations, then reserves another half-day to work on occlusion issues.
Dr. Malone also offered some tips on occlusion work:
It's often hard to get marking film to work with glazed porcelain, he said. Try putting Vaseline on the paper -- it activates the ink on the film.
Don't use Brasseler polishers to finish the job, he added. He used to swear by them, he said, but the company changed suppliers and he now prefers Komet polishers.
Once the polishing is done, the elaborate process should be complete. The dentist should be pleased with predictable results, he said, and the patient rewarded with a beautiful new smile.
Copyright © 2010 DrBicuspid.com

